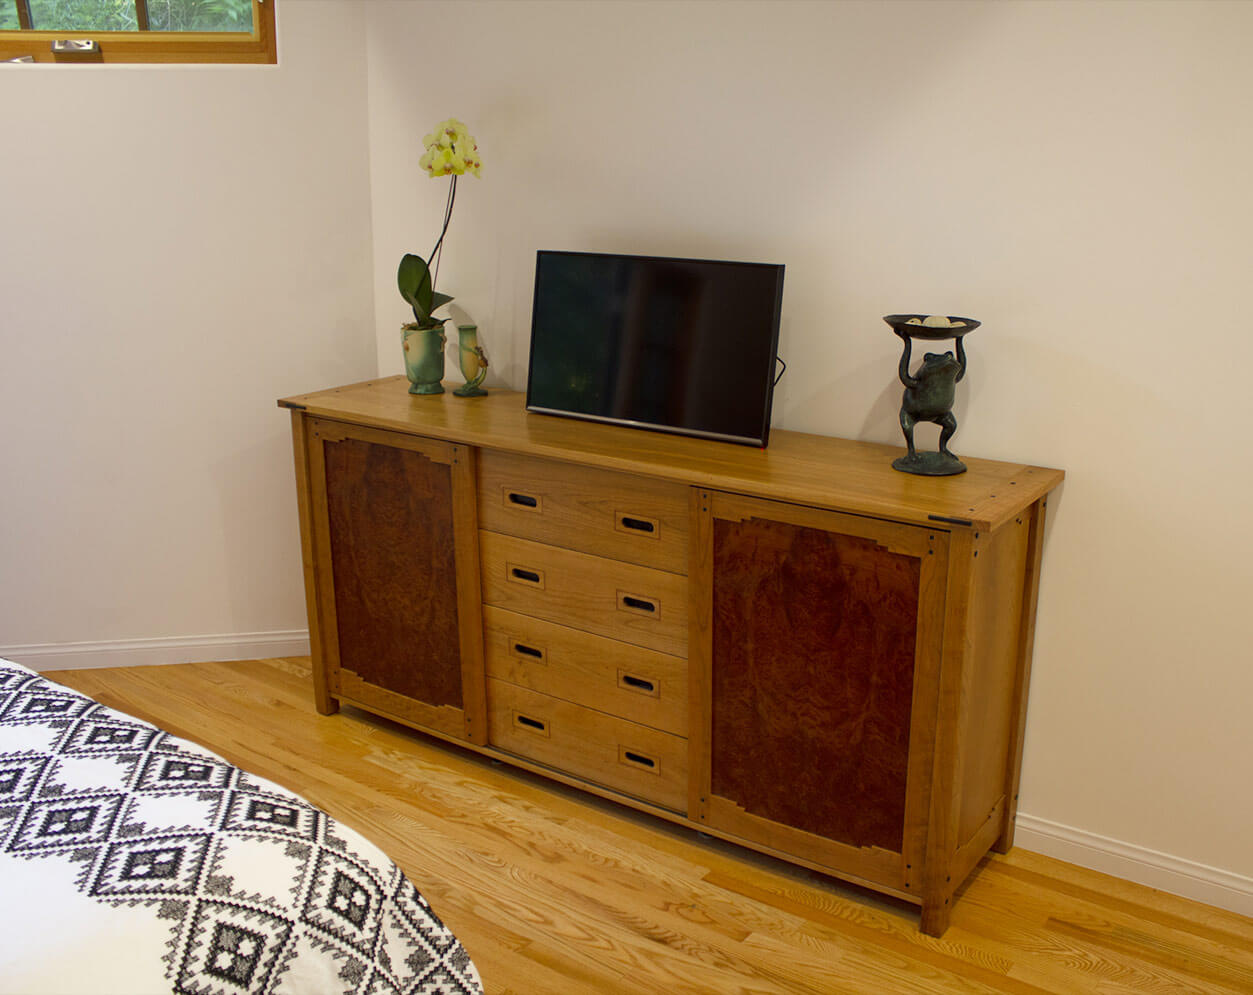
Cherry & Redwood Burl Media Cabinet
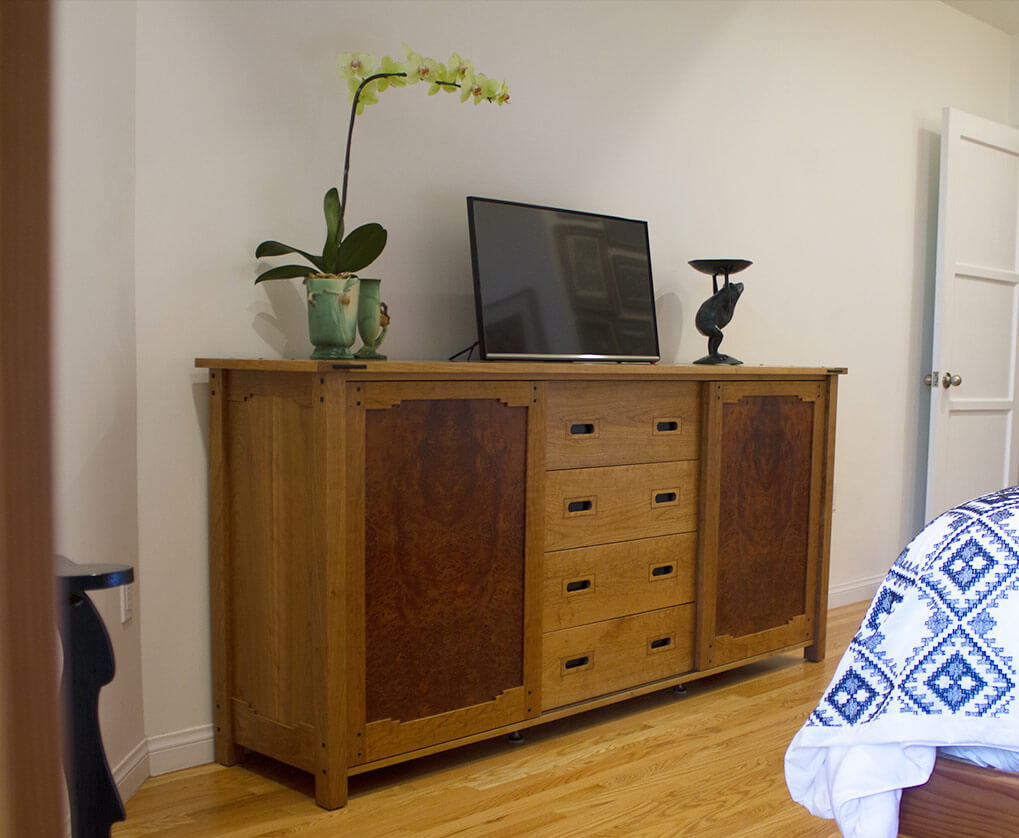
Old friends wanted a piece for their new master bedroom and bath addition to serve as storage and/or media cabinet (that purpose was still in arbitration at this writing). After extensive research and focusing we decided on something leaning toward Greene & Greene styling. I suggested that the room architecture also seemed a little Southwestern and introduced a suitable rail style for the end and door frames. All in all, I think this was one of the more enjoyable projects I’ve ever done…both because of the project itself and for the satisfaction of doing it for such special people.
Client Rick & Patty Cunha
Date March, 2020
Tools MicroFence Edge Guide
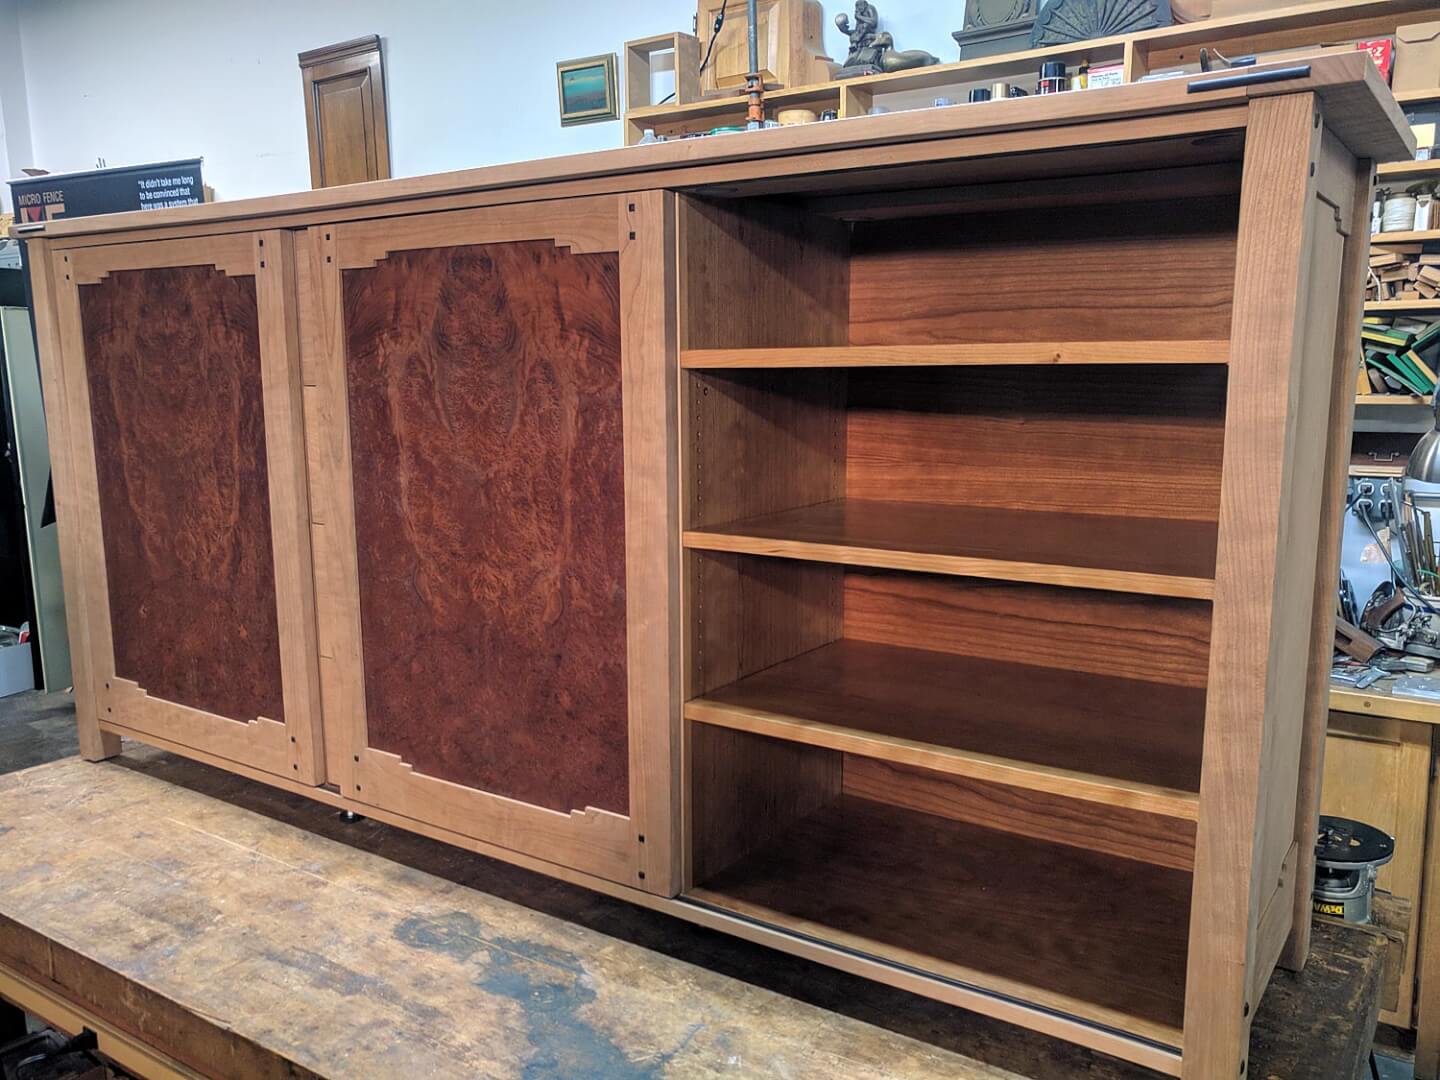
Two sliding doors pass in front of the central bank of drawers on a track with bearing wheels on their bottoms and retractable tabs at the tops. The two outer compartments feature adjustable shelving for storage.
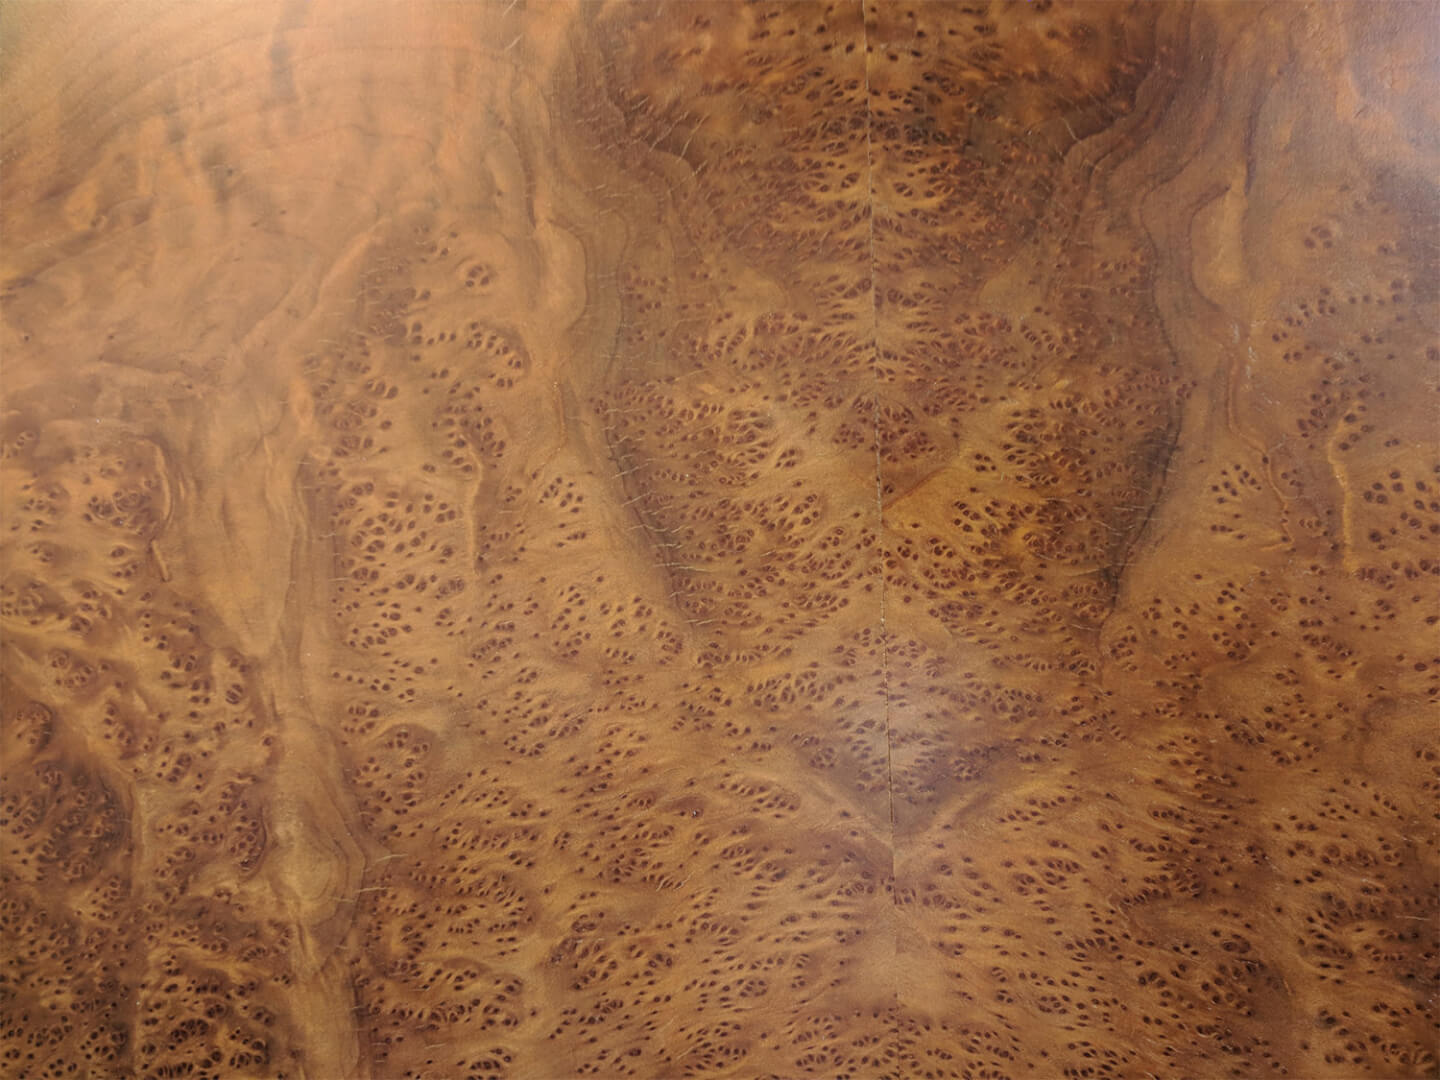
Fifty-year-old redwood burl made a complimentary choice for the cherry door frames. I found the burl in the early eighties at a custom plywood manufacturer’s plant when I was looking for materials for another commission. There were six sequence-matched panels that had been glued up for someone and they had never come back to purchase them. I think I paid something like $20 per panel. Then they sat for over forty years in three different lofts over three different shops in one of my ‘someday I’ll use ’em pile‘. It was nice to get to a someday.
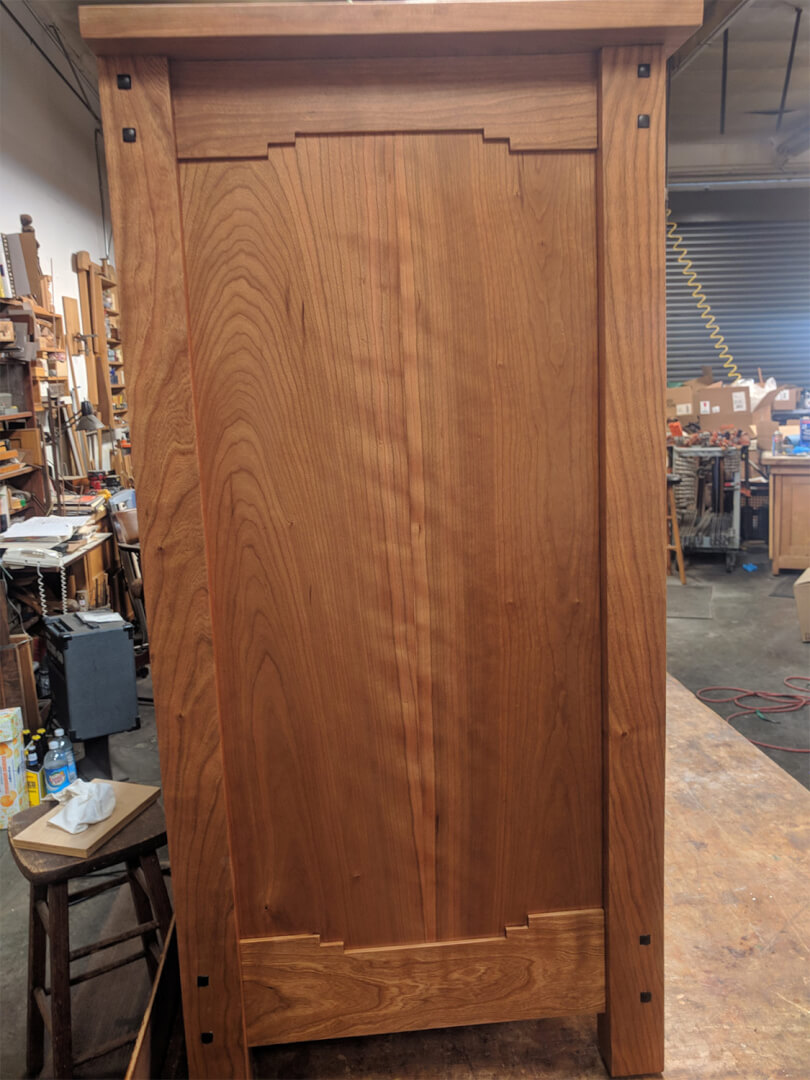
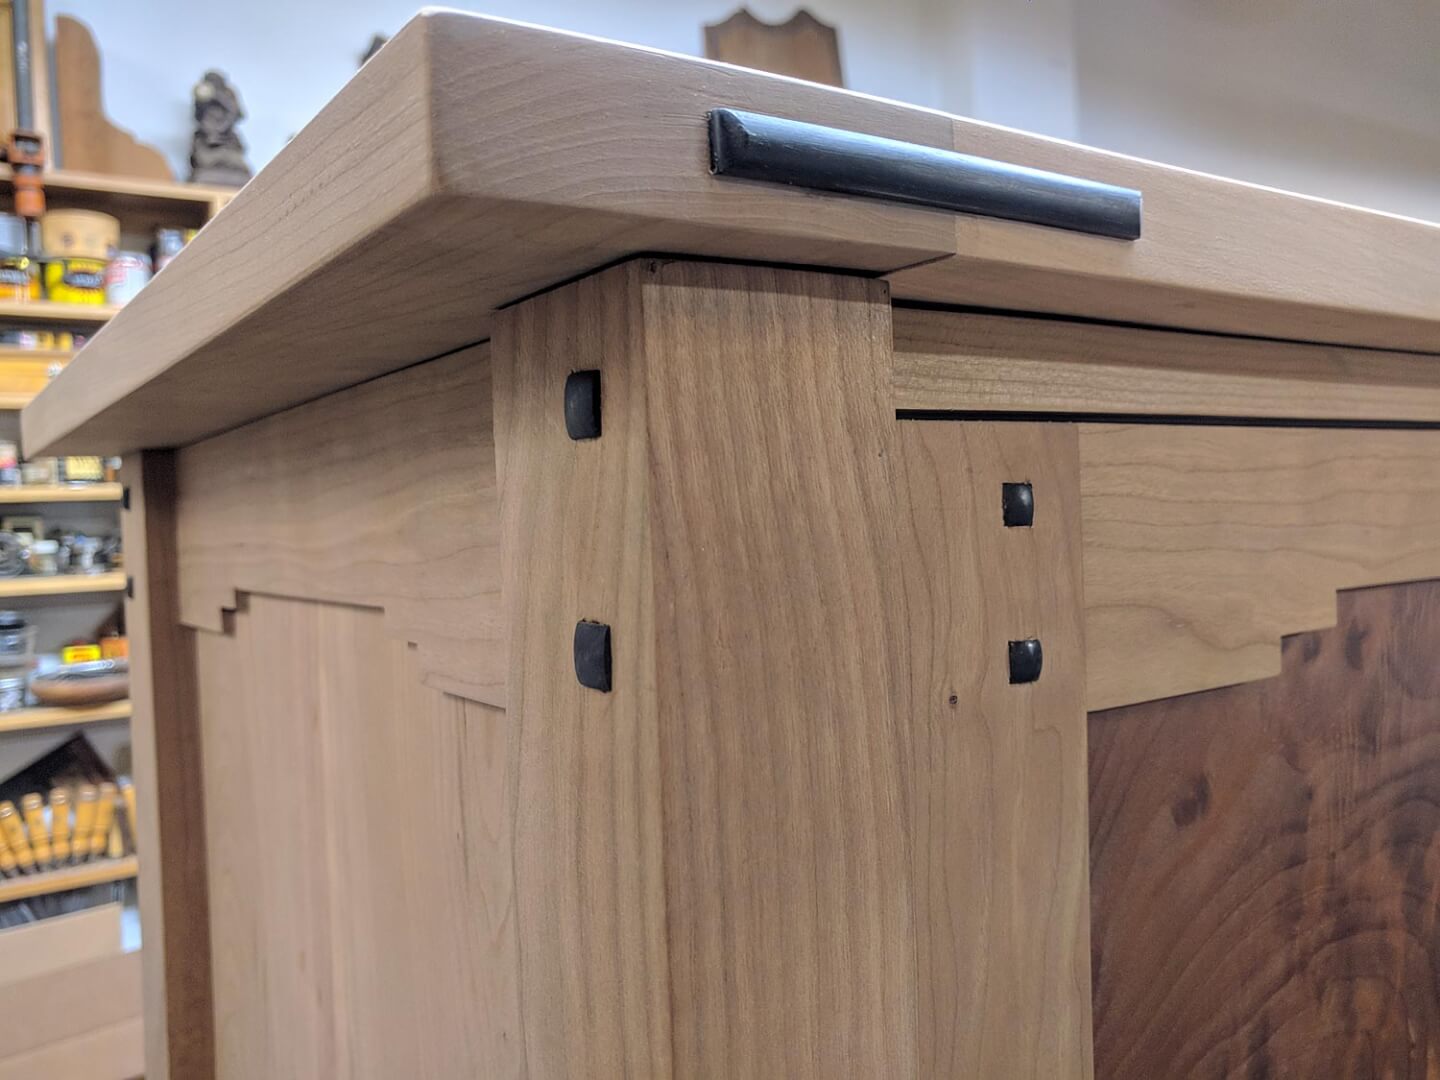
The end pieces of the casework featured a Santa Fe rail detail that seemed to complement the cabinets general personality, plus the milling challenge they presented was fun to work out.
Ebony pegs and splines are used to lock mortise and tenon joints together and accent the natural cherry (from traditional Greene & Greene detail styling).
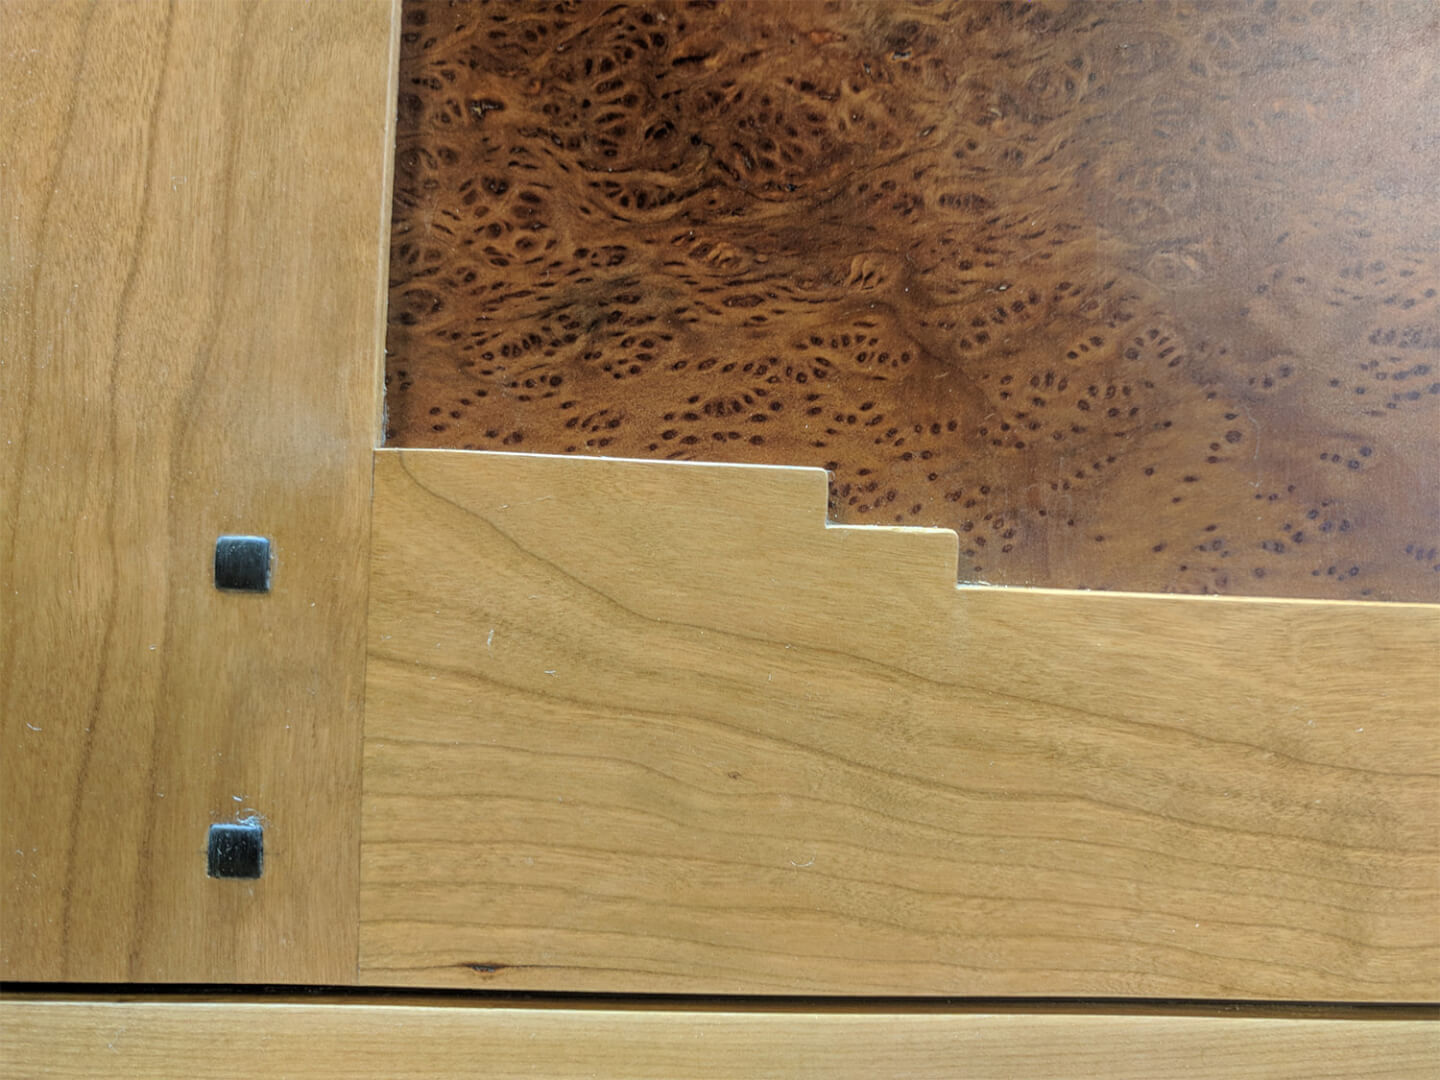
The stepped rails of the doors continued the detail established in the end panels and tied the design together nicely.
The flush pulls in the drawer fronts were through-milled with a 1″ router bit, then milled from the top side to create the radius finger pull and the 1/8″ cherry cover plate. The backs were milled before drawer assembly to provide the rabbet for a 3/32″ thick back plate of ebony.
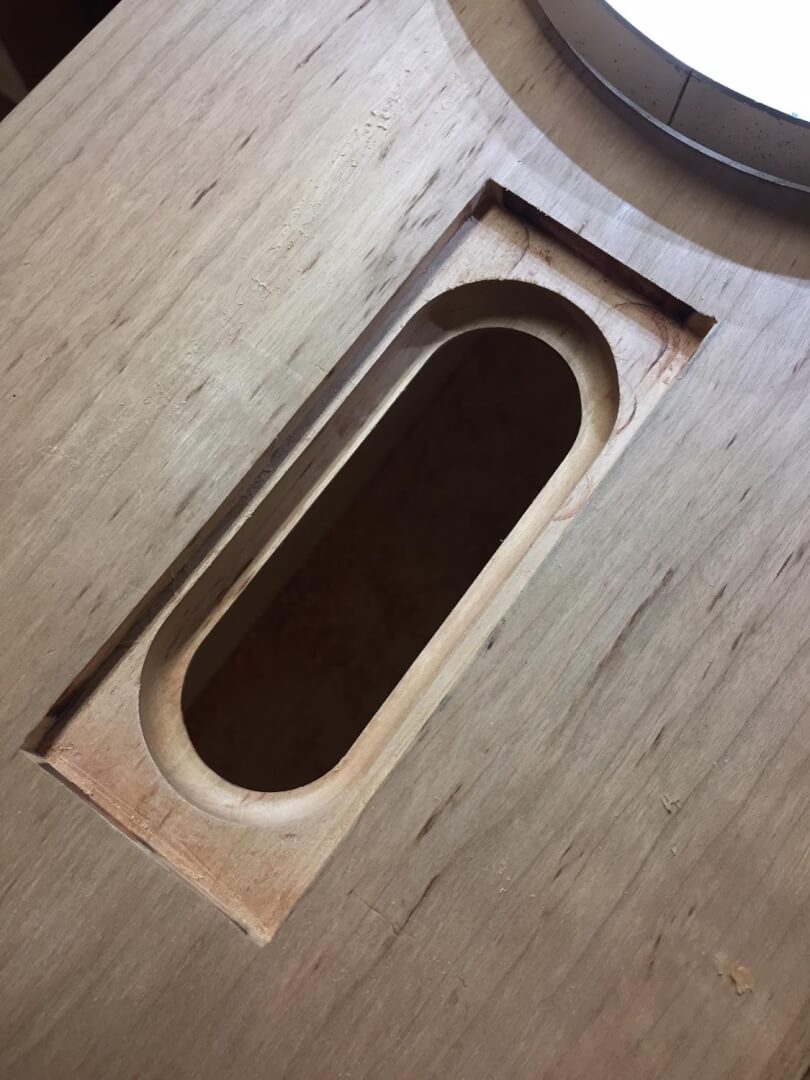
The completed milling of the drawer-pull recess with square-chiseled corners is ready for interior finishing before it’s ebony back plate, cherry front cover plate and mahogany inlay are installed.


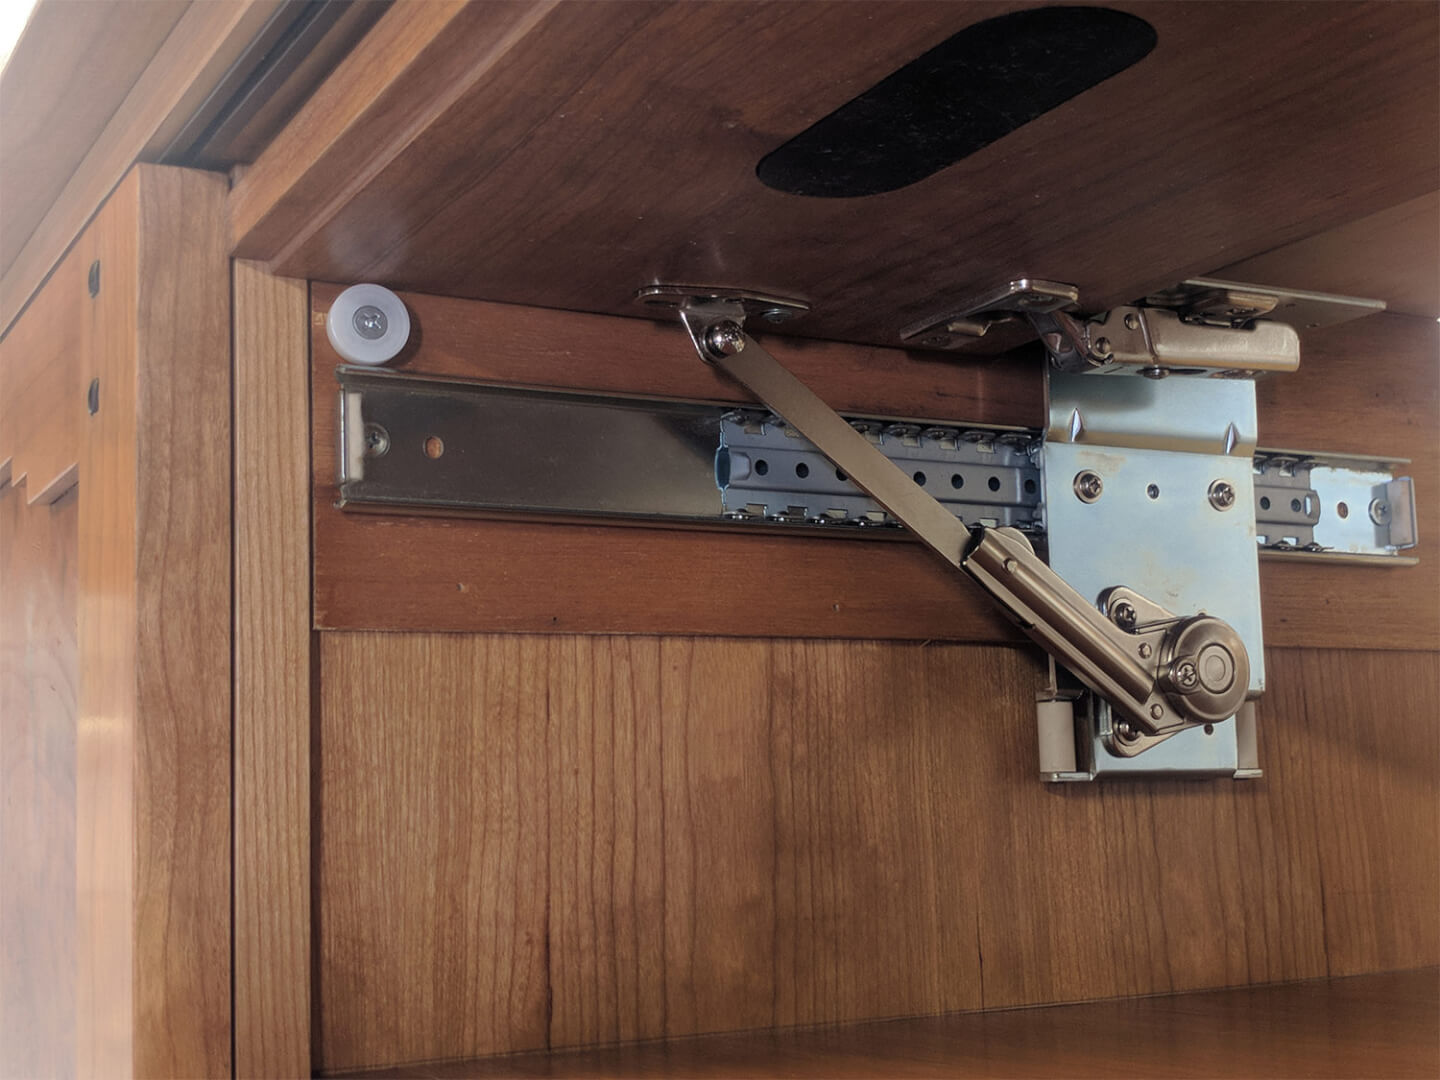
The bank of drawer fronts is set back so that the sliding doors (fit into tracks in the top and bottom) can pass in front to access the adjustable shelving in the outer compartments of the case.
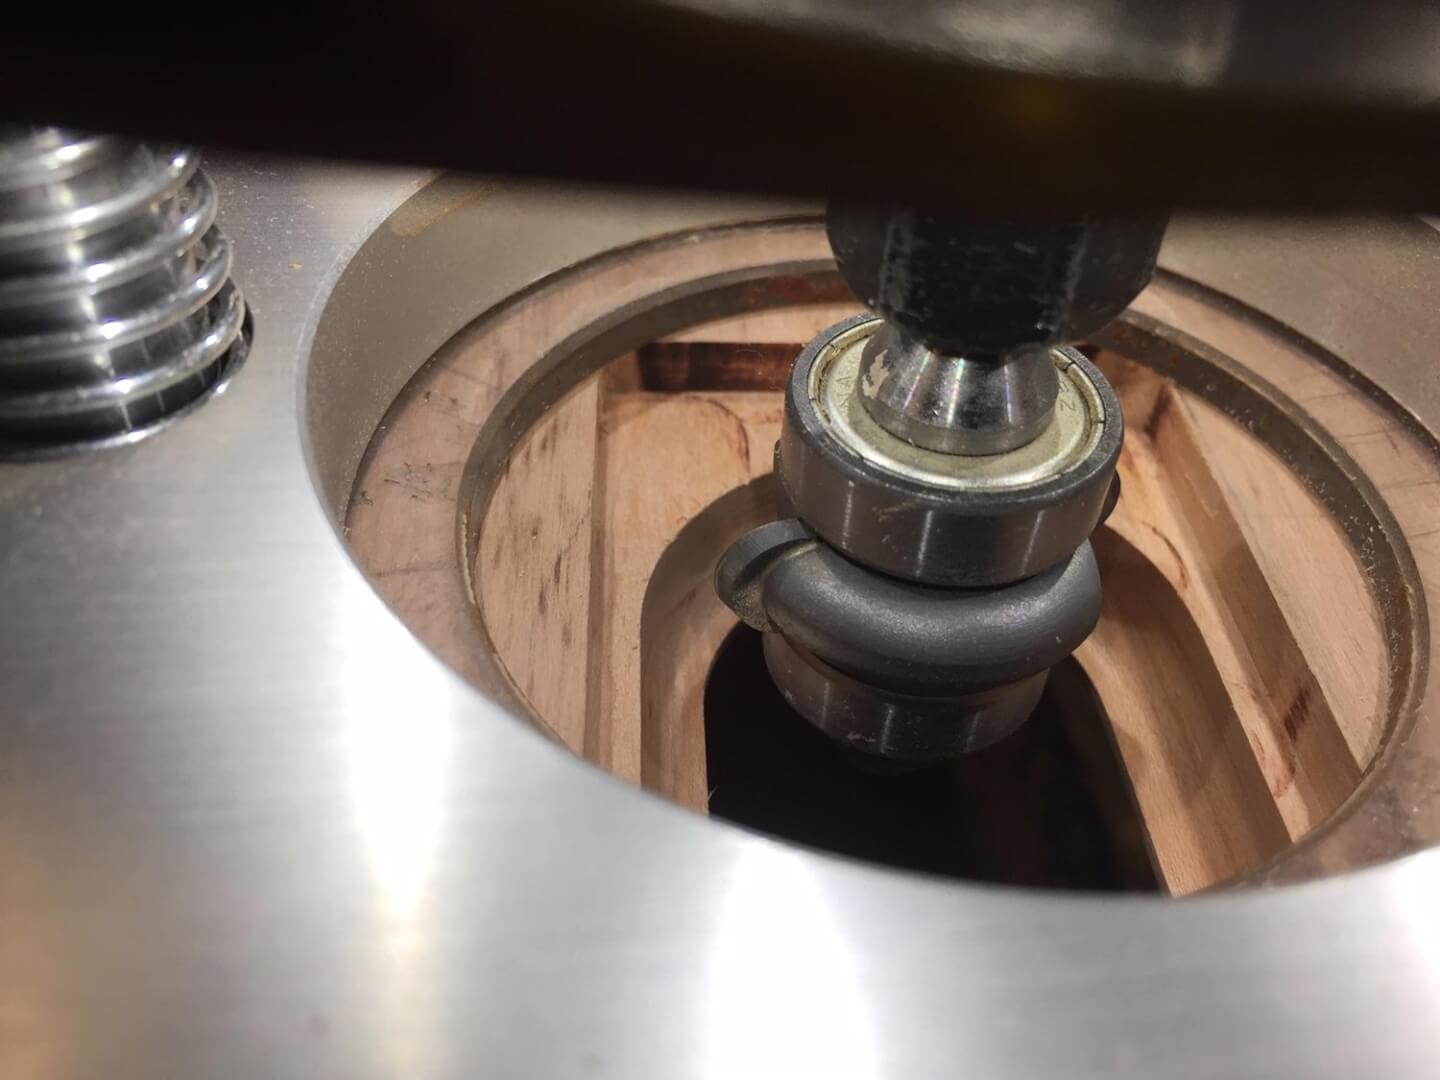
These drawer slides (you can find them in the Sugatsune catalog), also support a lid-stay so that the top drawer front could tilt up and slide back into the cabinet to make a cable box and A/V equipment accessible to the client’s remote control.
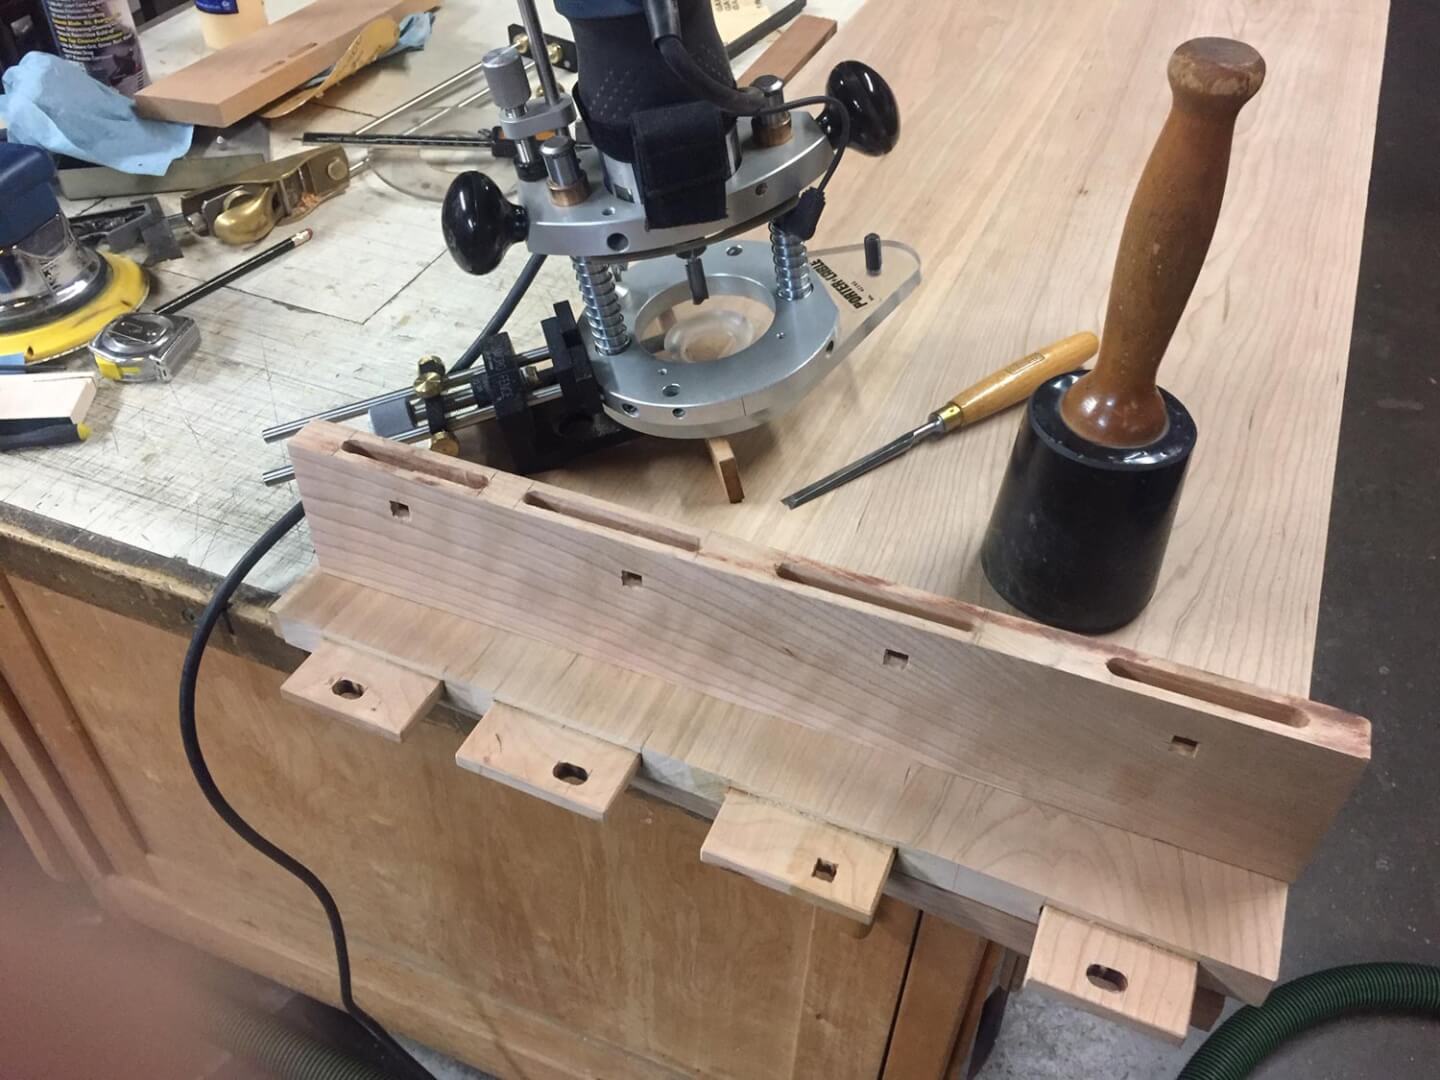
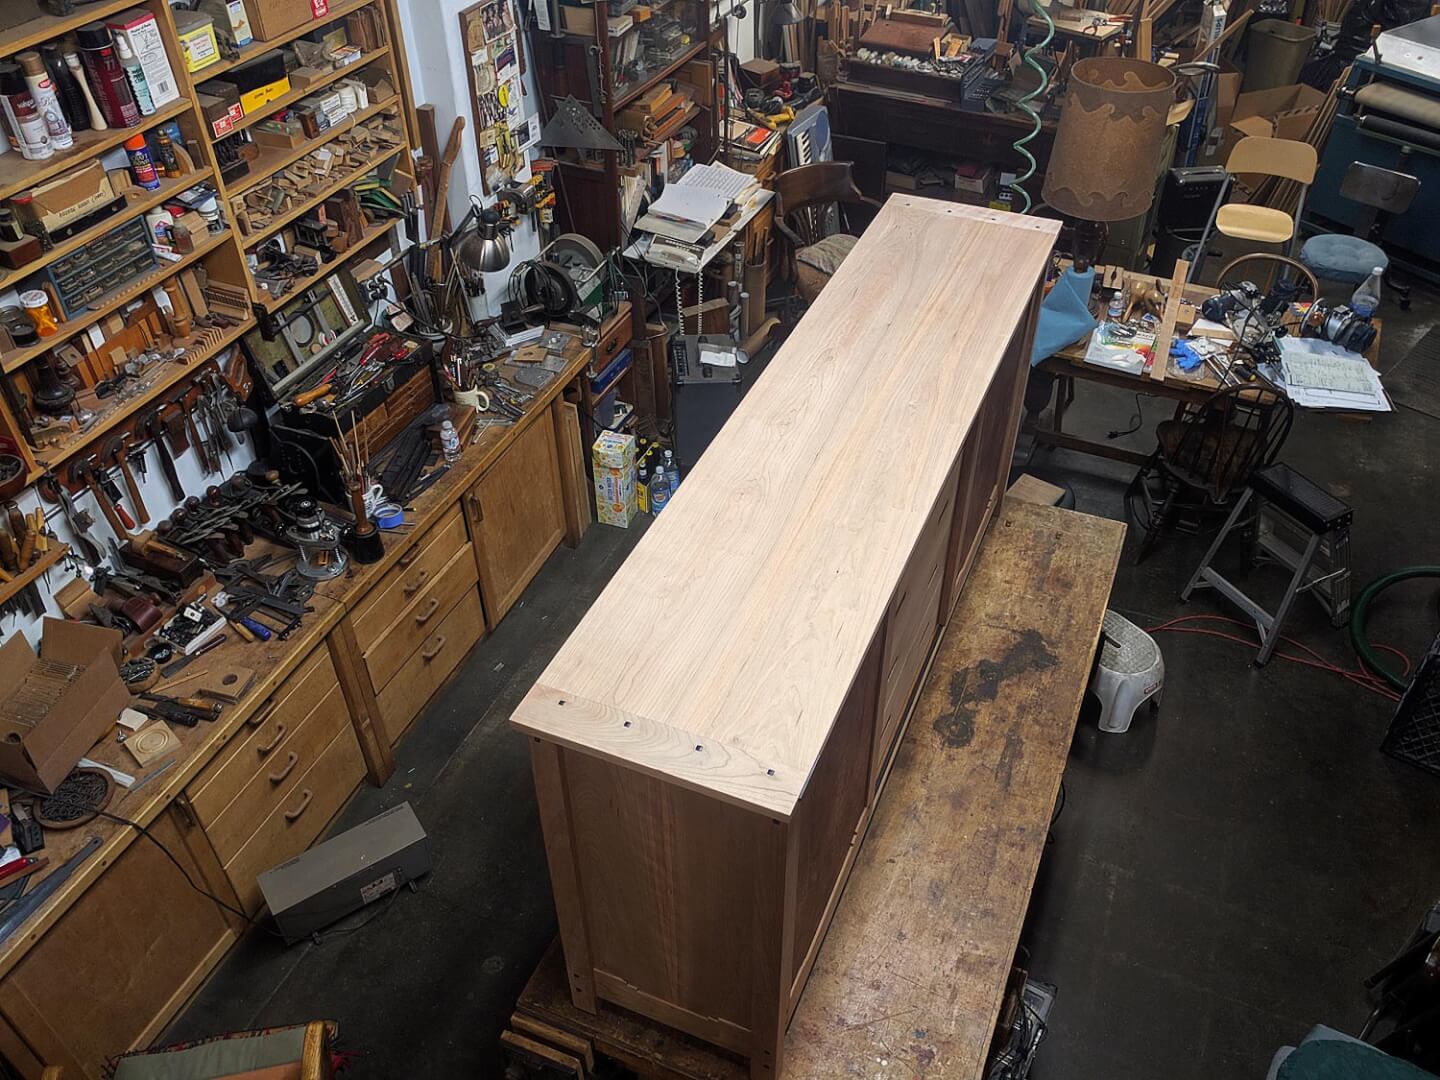
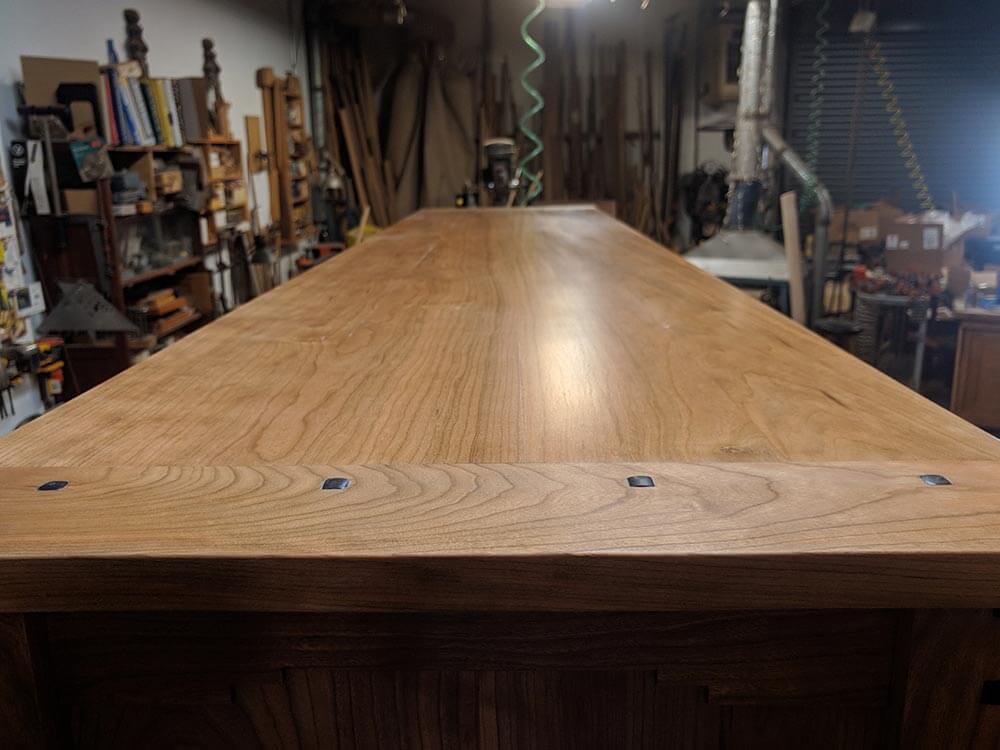
The 78″ long cherry top was made from four pieces of 7/8″ thick planks gradually milled down in steps from 5/4 stock. In between jointer and planer operations, the planks were stored on stickers with air flow all around. After a month or so of settling, the final dimension was milled and the ends capped with floating bread-board ends.
Loose tenons were glued into mortises in the ends of the six foot planks and elongated peg holes cut through the ends of the tenons that were to draw-fit the end cap pieces toward the planks. Square ebony pegs were made to hold the caps firmly and one of the four was glued permanents to it’s tenon (the third from the left). The other three pegs were left to float in their elongated holes to allow for expansion and contraction.